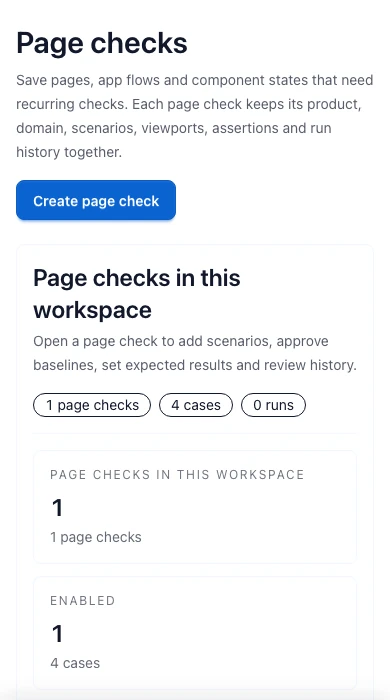
Many website tests start as a person checking a page after a release: read the heading, open the menu, submit a safe form state or confirm that a plan table still makes sense. Turning every one of those checks into a maintained code suite can be more work than the page deserves. Leaving them as memory makes the result hard to repeat.
RenderLog gives those checks a saved home. A Check Suite can hold scenarios, actions, assertions, viewports and visual baselines. The same recipe can be run manually while it is being shaped, after a deployment through CI or API, or on a schedule when a page needs an independent review.
Describe the state a person already knows how to check
Start with a visible outcome instead of a technical implementation. For a signup page, the outcome may be that the form shows its required fields and the submit action is present. For a pricing page, it may be that the plans, currency and primary action are visible. For a documentation page, it may be that the title, navigation and a key phrase are present in the rendered page.
Add actions only when they move the browser to the state you need to inspect. Then use assertions to make the expected result explicit. RenderLog supports checks for visible elements, text, input values and checked states, alongside visual output. A small scenario with a clear expected result is easier to own than a long flow with no decision at the end.
- Page content and headings that must remain visible after a content change
- Forms, menus and UI states that a customer reaches through a short path
- SEO-critical text and metadata states that should be checked in the rendered page
- Visual areas where an approved baseline makes a layout change reviewable
Use assertions to turn a screenshot into a test
A screenshot shows what was rendered but does not explain the expected result by itself. Assertions give the check a decision: this heading must exist, this text must be visible, this field must contain the expected value or this control must be checked. Keep the first assertion close to the risk that caused you to save the test.
Visual comparison answers a different question. It helps a reviewer see a layout, spacing or responsive change against an approved baseline. Use both when they complement each other. When a run reaches a login wall, CAPTCHA or missing selector, add failure rules so the wrong state is treated as a failed run instead of a convincing-looking result.
- Name the expected text instead of asking a reviewer to infer it from pixels
- Use a visual baseline for layout and responsive changes that need human review
- Fail early when the run reaches a wrong page state
- Keep each scenario focused enough that an owner can decide what to do
Run the same test where the work already happens
A no-code test is useful when it fits the team rhythm. Run it manually while a page is being edited, from CI after a release, through the API from a deployment workflow or on a schedule for pages that change independently. The saved recipe keeps the expected state and history together while the trigger can change.
Review the run result rather than treating a schedule as a pass/fail inbox. A failed assertion, changed baseline or bad render should point to the next action. If nobody owns a failure, lower the scope of the check or give it a clear notification path before adding more pages.
- Use manual runs to refine the scenario before making it recurring
- Start saved checks from dashboard, API, CI or a schedule
- Review screenshots, assertion results and run history together
- Send alerts where the person who can fix the state will see them
Keep no-code testing focused and honest
No-code testing is a practical fit for visible pages, short flows, content assertions and visual review. It does not remove the need for code-level tests, accessibility work, browser coverage decisions or a full end-to-end suite when a workflow has complex branching. It also cannot make a third-party dependency deterministic.
The strongest first suite is small. Choose a page, define the state, write the assertion, run it once and agree on the review path. Then add another scenario only when the existing result is useful. This keeps the history readable and makes a failure a conversation about a page rather than a maintenance project.
Choose the next RenderLog path
Browse RenderLog guides
Open practical guides for no-code tests, visual review and API output.
Guide: test website forms without code
Start with a visible form state and save only the checks worth repeating.
Website change monitoring
Keep recurring checks for public pages, releases and important customer states.
Website screenshot API
Use a request when a product or workflow needs a rendered file directly.
Guide: no-code tests for pages and forms
Start from the state a person already checks and save only the scenarios worth repeating.
Guide: SEO checks for public websites
Combine rendered content, visual evidence and no-code assertions for important pages.
Guide: fail bad render results early
Keep login walls, CAPTCHAs and missing selectors from looking like clean runs.
Save the next check someone will otherwise repeat by hand
Name the page state, add one assertion that matters and run it once. Keep the scenario only if its result gives the team a clear decision.