A screenshot API is useful when a product, deployment or content workflow needs a rendered page rather than a browser process to maintain. The file might be a screenshot for a release record, a PDF for a document flow, HTML or Markdown for a content pipeline or a stored artifact for later review.
RenderLog treats that request as a run with an output and history. Use a short GET request for a straightforward URL. Use POST when the page needs headers, cookies, steps, assertions or labels. Ad-hoc API requests use the default RenderLog artifact storage. If the same setup repeats, save it as a workspace page check when it needs a configured storage destination, shared review context or notifications.
Choose the request shape that matches the page
GET is useful for a simple URL-based capture where the page can render with its public defaults. It keeps the first integration small and works well for a one-off page output. POST gives the request a place to describe the real job when the page needs more context or a repeatable configuration.
The difference is about setup, not a separate product. Both paths produce a run that can be inspected and connected to later work. Start with the smallest request that is truthful about the page state, then add only the controls required to reach and validate that state.
- Use GET for a public URL and simple output request
- Use POST for headers, cookies, steps or assertions
- Label runs so a later reviewer can identify the product or release context
- Use a saved workspace check when a configured storage destination matters
- Keep full API tokens and private values out of URLs and shared output
Request the output your workflow can use
A screenshot is only one useful result. RenderLog can produce screenshots, PDFs, HTML, Markdown and stored files from the same render model used by saved page checks. That lets a team use the dashboard for review while an application or pipeline consumes the file it needs.
Use viewport and render settings that describe the intended audience or document. Ad-hoc API runs keep their artifact in default RenderLog storage. Use a saved workspace check when another step needs a configured destination, and keep the output label meaningful. A rendered file should be connected to a page, state and run context so someone can understand what it represents later.
- Use screenshots for release evidence, visual review and page records
- Use PDF, HTML or Markdown when a document or content workflow needs it
- Use a saved workspace check when a later process needs a configured destination
- Keep output names and labels useful to the person reviewing run history
Add checks when a file alone is not enough
A successful response does not necessarily mean the correct page was rendered. An authentication wall, a missing selector or a changed content state can still produce a valid image. Add assertions and failure rules when the workflow has an expected heading, element, input value or checked state that should be verified with the output.
When a screenshot needs ongoing review, save the setup as a Check Suite or Check Case. Later runs can compare the visual result with an approved baseline and keep the decision in run history. The API remains a useful trigger while the dashboard gives people a place to inspect the evidence.
- Assert the page state that makes the output useful
- Fail a bad render instead of treating a login wall as a successful file
- Save repeating requests as a page check with a baseline when appropriate
- Review the output beside its assertions and run status
Know the boundaries of an API render
The API renders the state described by the request at the time it runs. It does not make external services stable, remove the need to protect credentials or guarantee that a page will look the same for every visitor. Cookies, headers, consent states and third-party content should be treated as part of the requested state and reviewed with care.
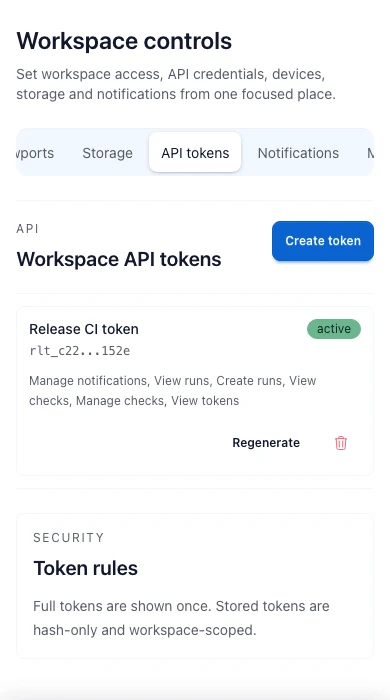
Keep tokens scoped and masked in workspace settings. Do not put complete credentials in a public URL, a screenshot or a shared log. If the workflow needs a durable decision, keep the output and the assertion result together in RenderLog so the next person can trace the file back to its request and review history.
Connect API output to the product workflow
Browse RenderLog guides
Open practical guides for no-code tests, visual review and API output.
Guide: capture website screenshots with an API
Choose the request shape and output that fit the real page workflow.
Website change monitoring
Use recurring page checks when an output must be reviewed after later changes.
No-code website testing
Add visible-state and content assertions without maintaining a browser suite.
Guide: choose GET or POST
Match the first API request to the amount of page setup the real job needs.
Guide: manual screenshots for release checks
Start with a visual answer and save the setup when the same review repeats.
RenderLog API docs
Read the public request, run and artifact surfaces before wiring an integration.
Start with the smallest useful render request
Capture the page you need, inspect the returned run and add setup or assertions only when the real workflow requires them. Save it as a check when the same page needs ongoing review.