How to capture website screenshots with an API
Use the RenderLog API for one-off website screenshots, configured renders and repeatable visual evidence with an API token.
On this page
Use this when
- Use GET for a simple public URL and small set of options.
- Use POST for headers, cookies, flow steps and failure rules.
- Use a saved check for a baseline, comparison and review history.
Choose the smallest API workflow
A screenshot API can serve several different jobs. You may need one image for a report, a configured render with headers and cookies or a repeatable visual check with a baseline and review history. Decide which result you need before choosing the request shape.
The website screenshot API gives RenderLog three practical paths. Use GET for a quick URL-based capture. Use POST when the request needs structured settings. Run a saved check when the page needs an approved expectation and a history that somebody will review.
Create a token and send it safely
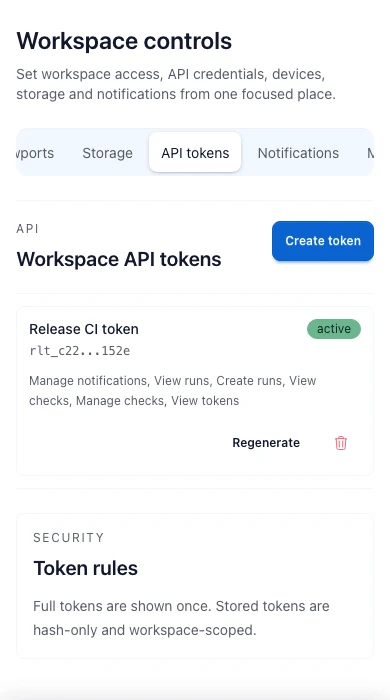
Create a workspace API token with the scope required by the endpoint and keep the returned secret private. Send it in the Authorization: Bearer rl_live_xxx header. RenderLog checks the token, its expiry and its scopes before it starts the run. A token can be revoked or given an expiry in workspace settings.
Do not put a token in a page URL or browser-side code. GET query values can be recorded by logs, browser history or analytics, so keep sensitive headers and cookies in a POST body. The API documentation lists the endpoint authentication and the fields available for each request.
- Use a workspace token rather than a user session for API calls.
- Grant
runs:writeto start a render andruns:readto poll its job or read the result. - Send secrets in headers or POST fields that the endpoint supports.
- Rotate or revoke a token when the calling system changes.
Use GET for a simple capture
For a public page with no special setup, call /api/render with a URL and optional rendering parameters. The request can include format, width, height, dpr, selector and fullPage. For example, a URL-encoded page can be captured with format=png and a stable desktop viewport.
The response is a public job shape with an id, a status and a result when the run has completed. The result includes the run and artifact information. Use GET when the URL and options are safe to place in a query string and the request does not need structured JSON.
- Encode the target URL before placing it in the query string.
- Use
selectorfor one element orfullPage=truefor the whole page. - Keep width, height and device scale factor stable for comparisons.
- Read the returned job status before assuming an artifact is ready.
Use POST for real render settings
Use POST /api/render with a JSON body when the capture needs headers, cookies, a user agent, a locale, flow steps, hidden selectors or failure rules. The body accepts a URL for page input and defaults the output format to PNG. It can also render HTML or Markdown input when the request supplies the corresponding body. An ad-hoc render uses RenderLog artifact storage by default; retrieve the artifact URL returned with the job instead of adding a storage setting to the request.
A practical POST body can include url, format, headers and failureRules. Failure rules can mark a result bad when a known challenge appears or when a required selector is missing. That keeps a technically completed browser session from being mistaken for a useful page result.
- Use JSON for settings that should stay readable and reviewable.
- Use headers and cookies only for the target state you are allowed to access.
- Add a missing-selector rule for a required application root.
- Use
async: truewhen the caller should start the job and poll later.
Poll the job and read the artifact
A render can be queued or running before the browser result is available. Poll GET /api/jobs/{id} with the same bearer token until the status reaches a terminal state. The documented statuses are queued, running, passed, failed and canceled. Read the result rows and artifact URLs only after the job has completed.
Keep the job id with the build, report or record that requested it. The returned artifact URL is the evidence that another system can retrieve. If the job fails, preserve the status and result details for diagnosis instead of retrying blindly. A retry may create another billable run and can hide the original setup problem.
- Poll with a bounded interval and stop on a terminal status.
- Treat
failedandcanceledas outcomes that need handling. - Store the job and run identifiers beside the calling build or report.
- Retrieve artifacts from the returned URL after the run is ready.
Diagnose failures and choose the next layer
A 401 usually means the bearer token is absent, expired or invalid. A 403 can mean the token lacks runs:write for starting or runs:read for polling, or is trying to access another workspace. A successful request with a failed run points to the page state, access setup, challenge detection or a missing target. Check the run result and the request settings before changing the URL.
The render endpoint creates page evidence. If the page needs an approved baseline, repeated scenarios, assertions or visual review, move to a saved web test and use the API to start its run. If the job is only a one-off image, keep the workflow small. GET and POST API examples can help decide when that boundary has been reached.
Related links
Ready to apply this on a real page?
Turn the next important page into a saved result, a reviewed baseline or a recurring check instead of leaving it as a one-off issue.